Content
Computers
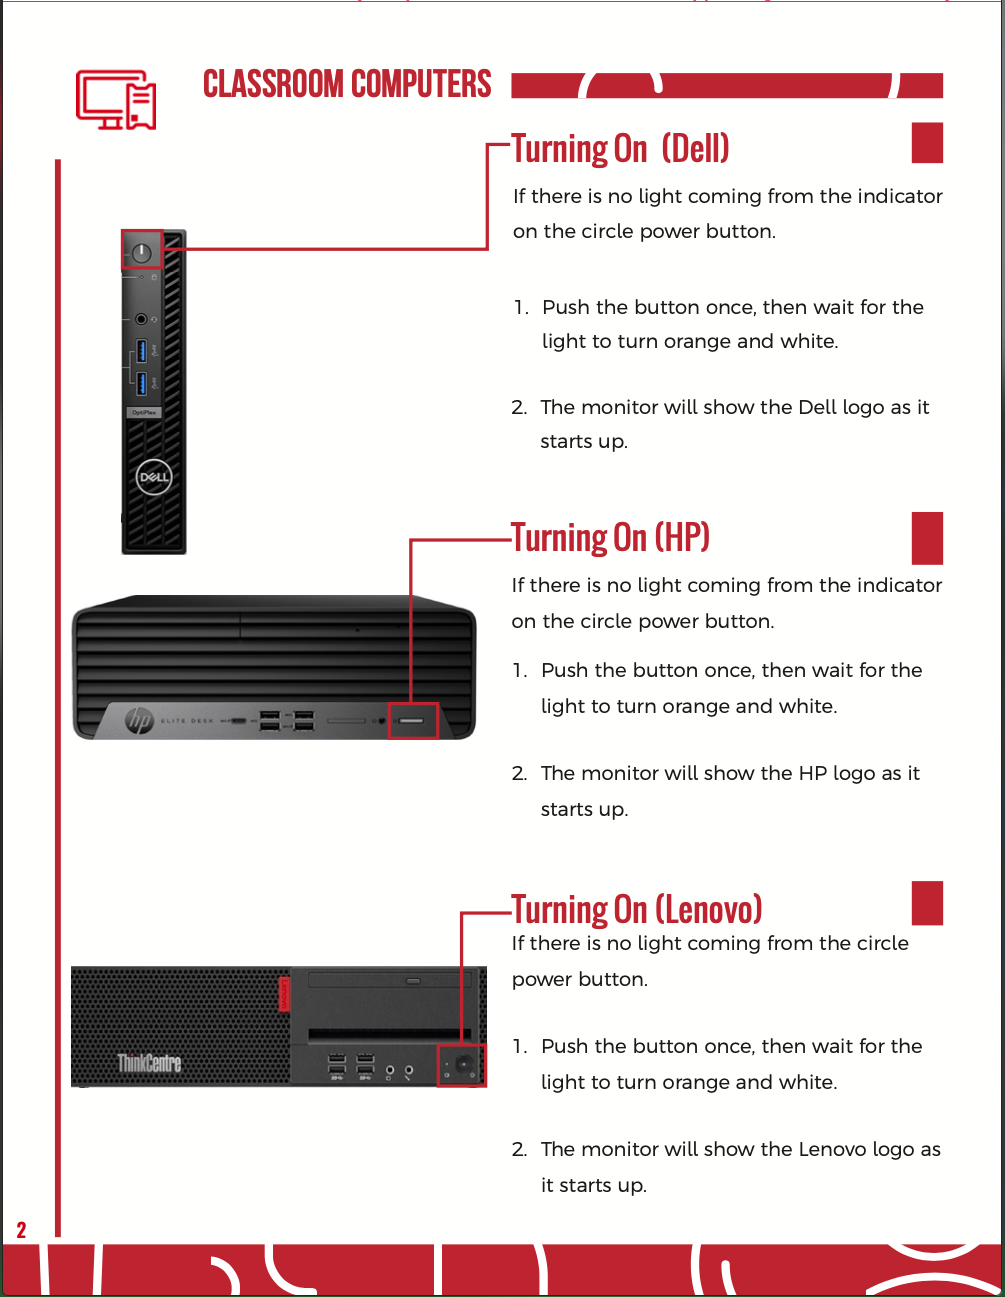
Turning On (Dell)
If there is no light coming from the indicator on the circle power button.
- Push the button once, then wait for the light to turn orange and white.
The monitor will show the Dell logo as it starts up.
Turning On (HP)
If there is no light coming from the indicator on the circle power button.
- Push the button once, then wait for the light to turn orange and white.
The monitor will show the HP logo as it starts up.
Turning On (Lenovo)
If there is no light coming from the circle power button.
- Push the button once, then wait for the light to turn orange and white.
- The monitor will show the Lenovo logo as it starts up.
Microphones
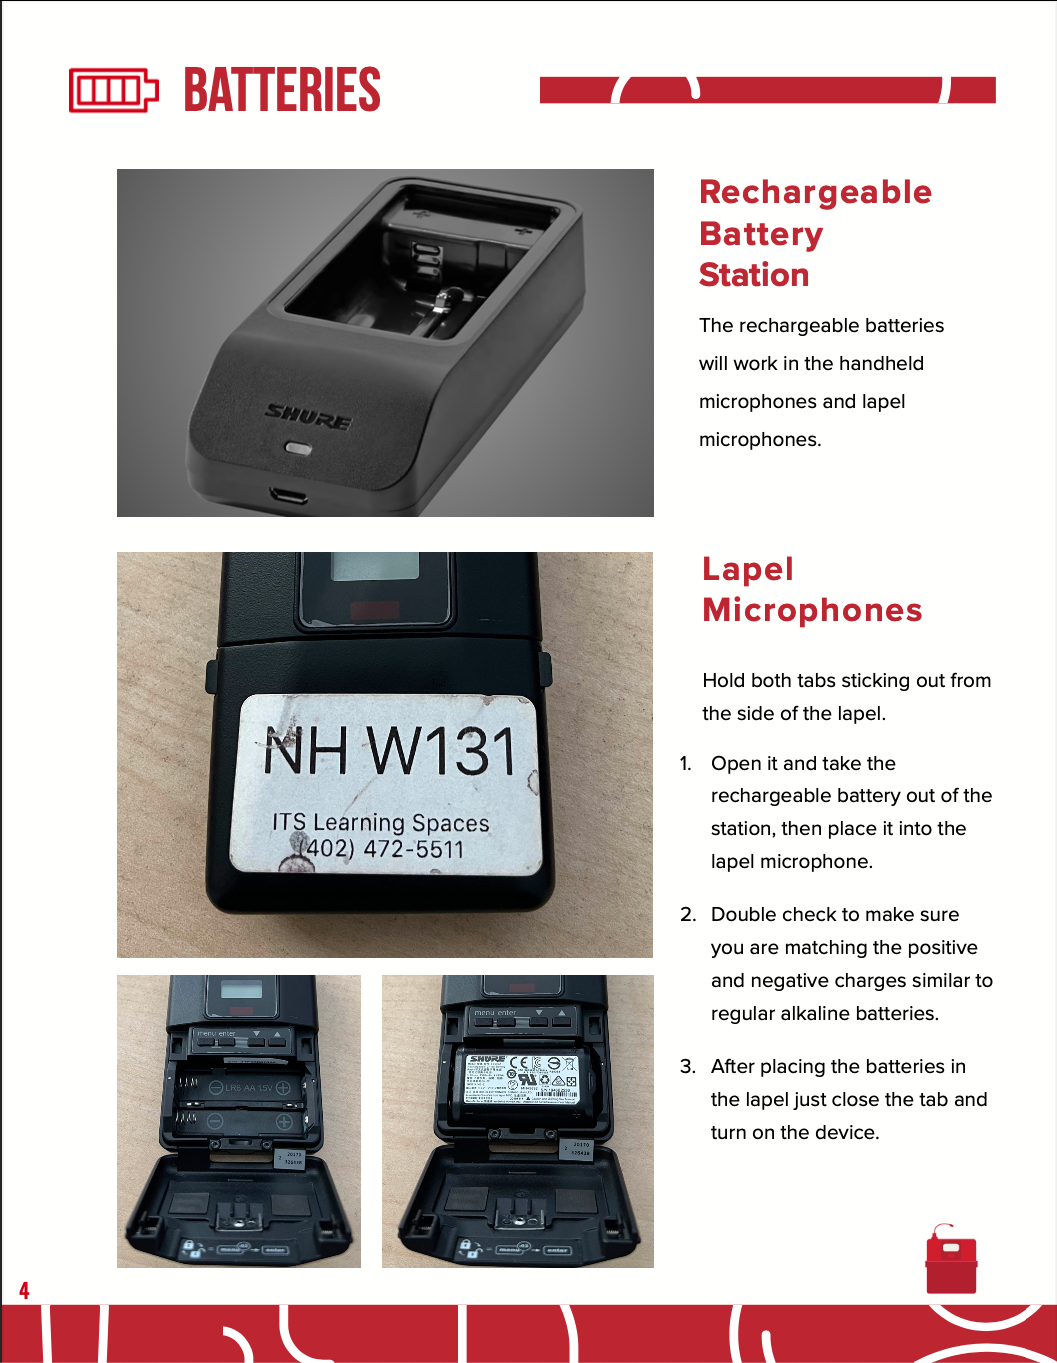
Using the Lapel Microphones
Hold both tabs sticking out from the side of the lapel.
- Open it and take the rechargeable battery out of the station, then place it into the lapel microphone.
- Double check to make sure you are matching the positive and negative charges similar to regular alkaline batteries.
- After placing the batteries in the lapel just close the tab and turn on the device.
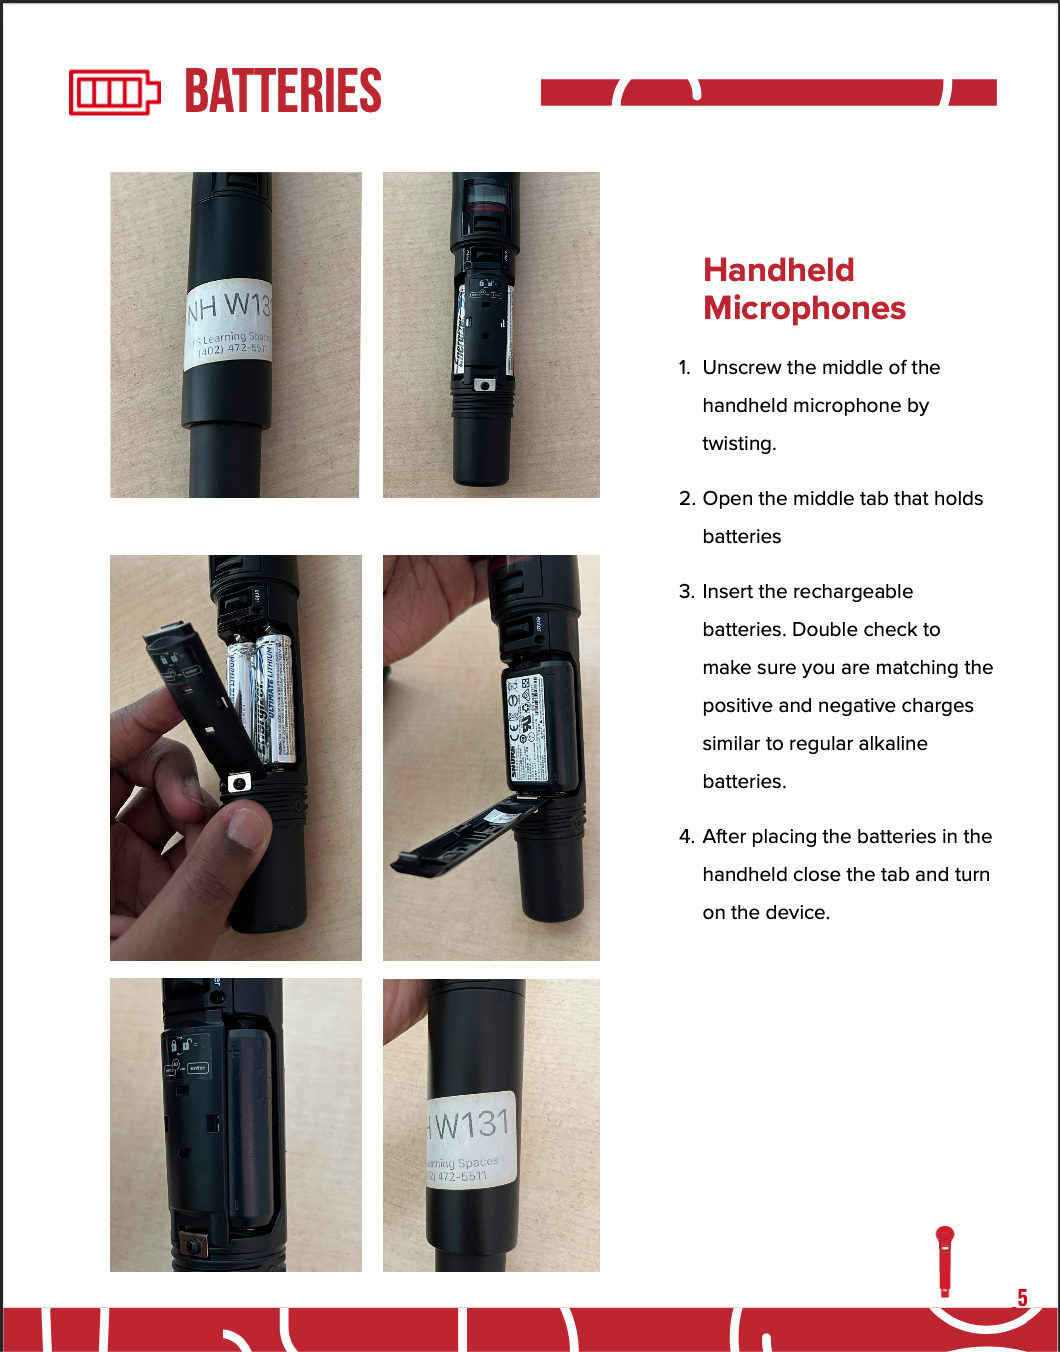
Using the Handheld Microphones
- Unscrew the middle of the handheld microphone by twisting.
- Open the middle tab that holds batteries
- Insert the rechargeable batteries. Double check to make sure you are matching the positive and negative charges similar to regular alkaline batteries.
- After placing the batteries in the handheld close the tab and turn on the device.
Control Interfaces
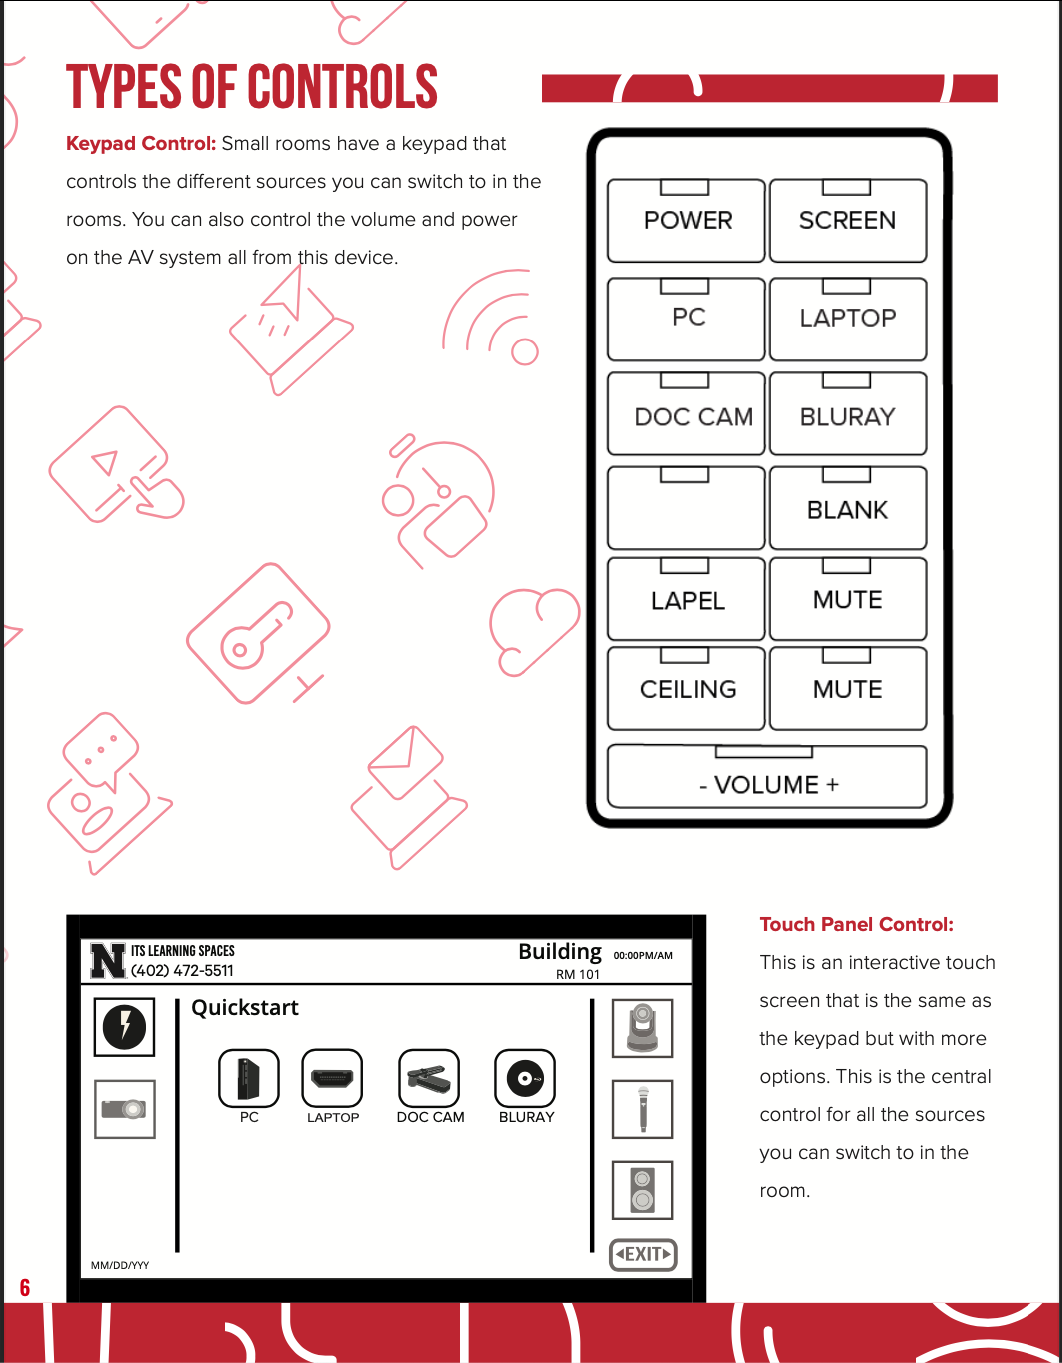
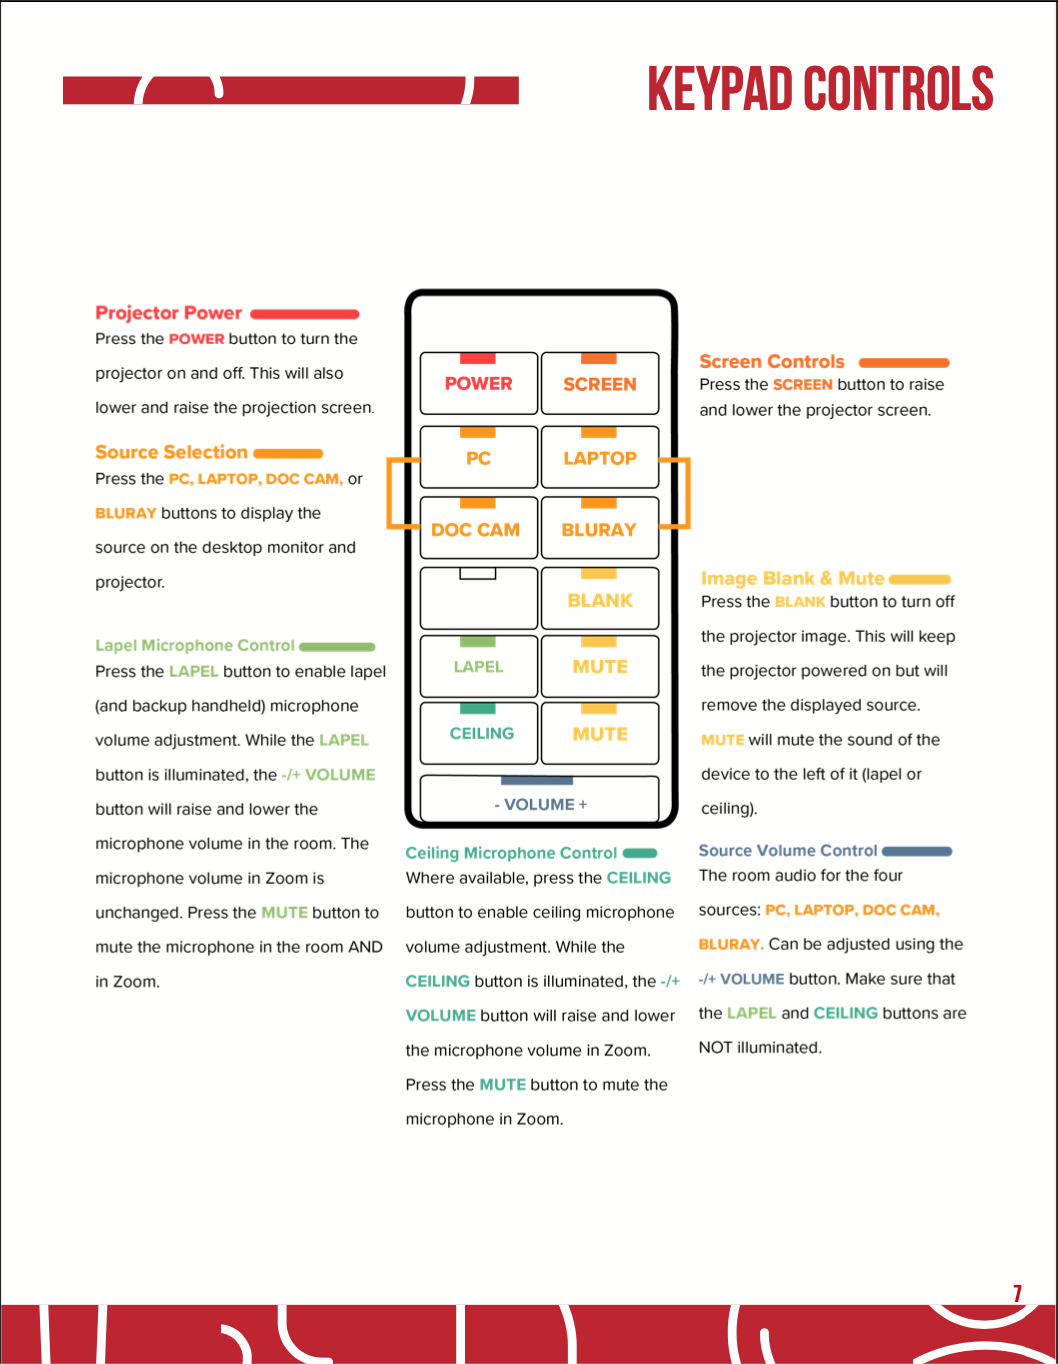
Keypad Control:
Small rooms have a keypad that controls the different sources you can switch to in the rooms. You can also control the volume and power on the AV system all from this device.
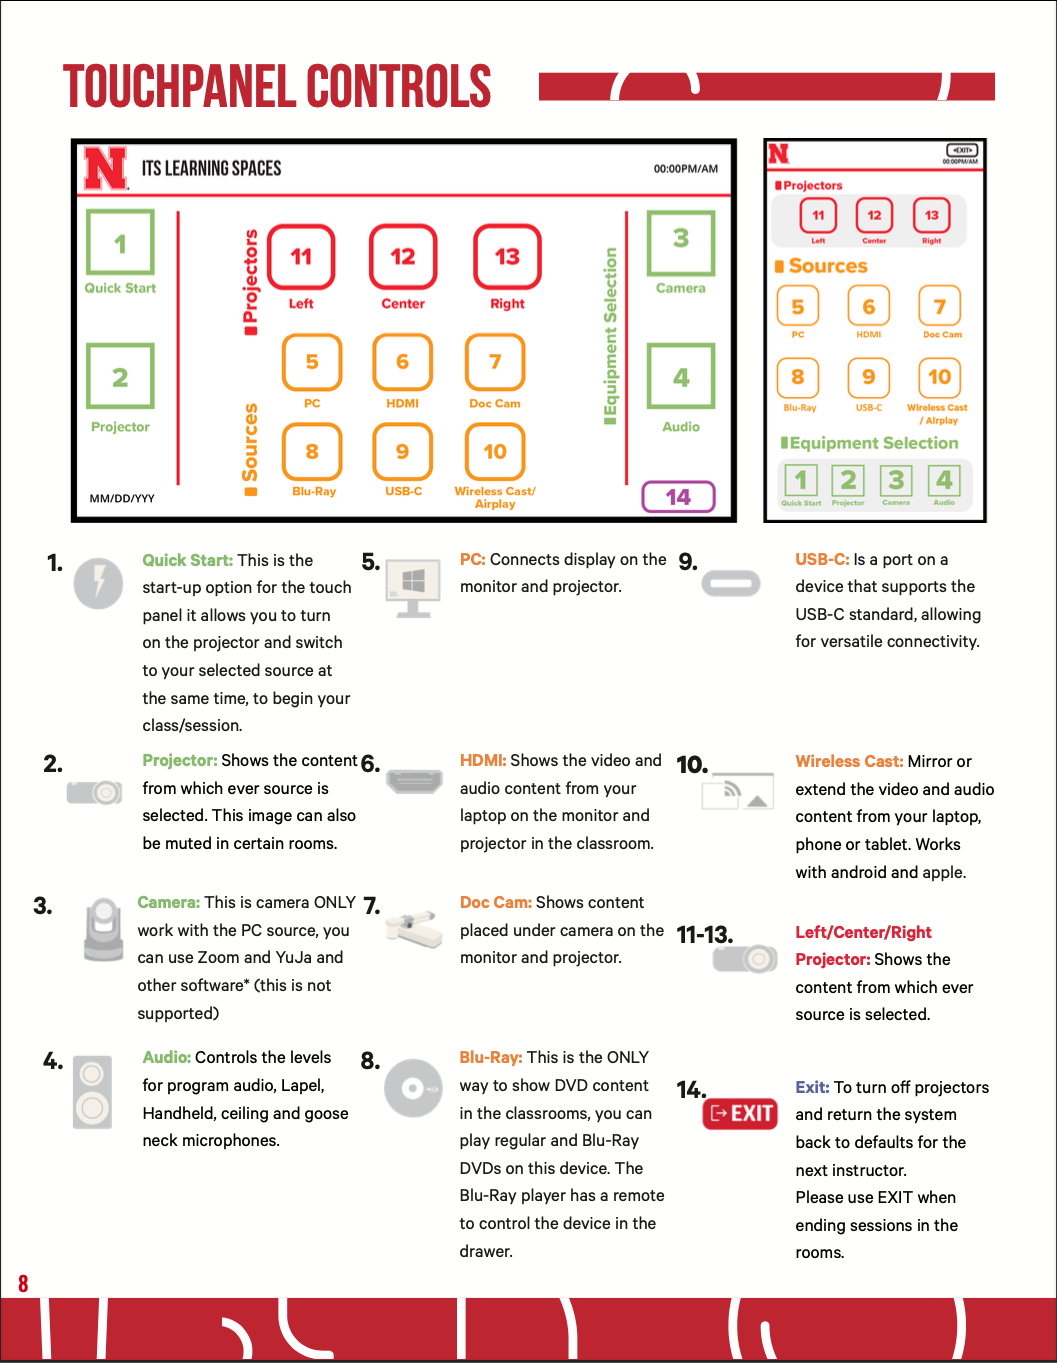
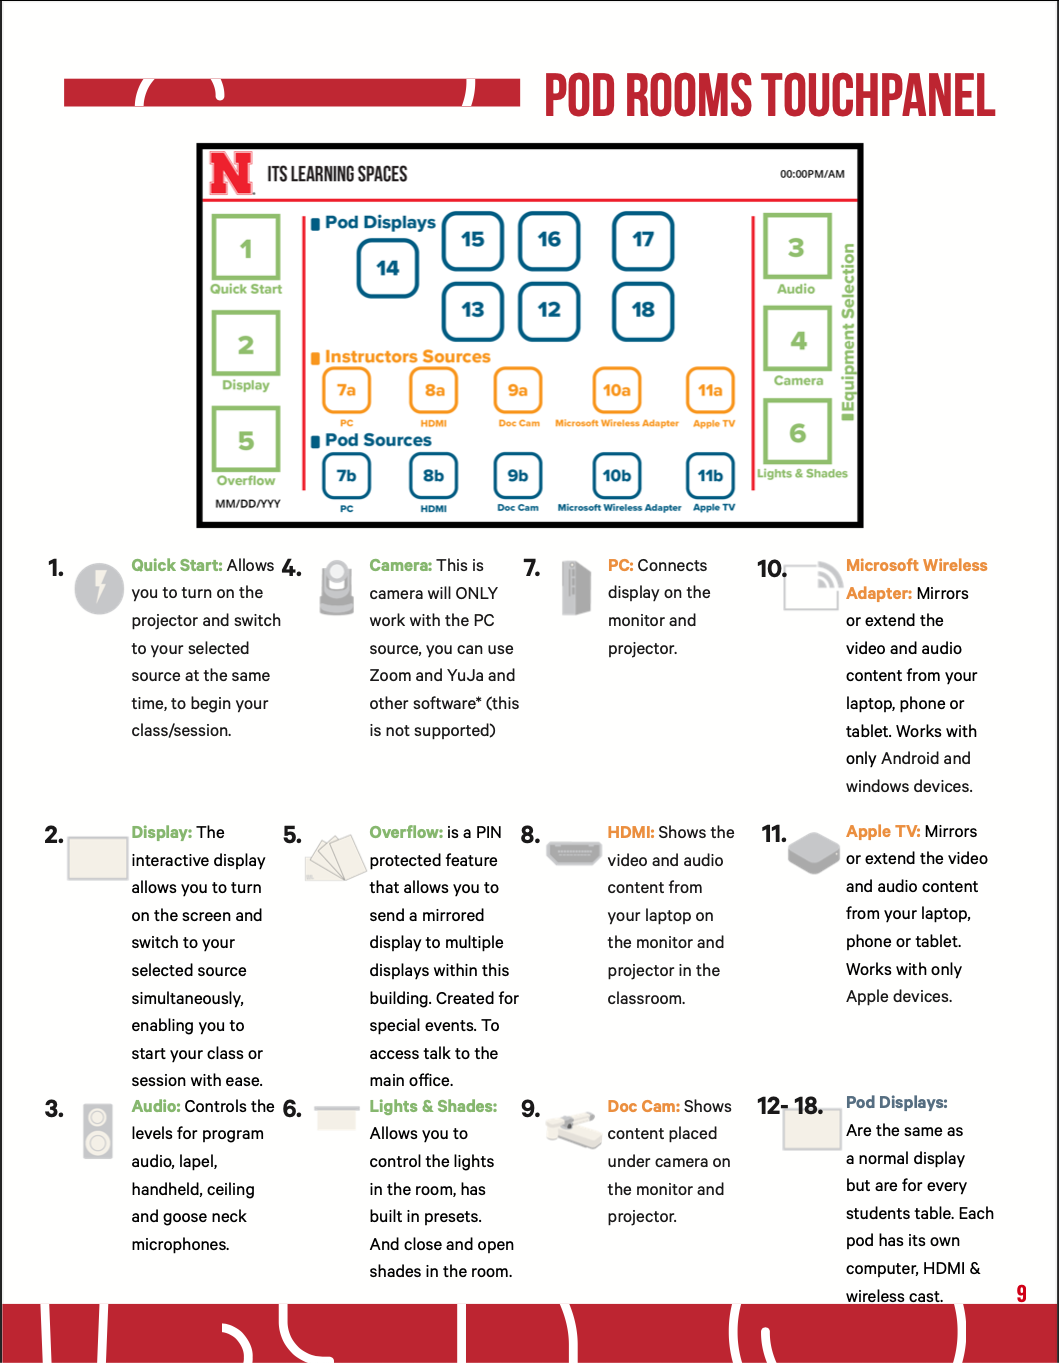
Touch Panel Control:
This is an interactive touch screen that is the same as the keypad but with more options. This is the central control for all the sources you can switch to in the room.
Touch Panel
Audio Adjustment
Troubleshooting Audio
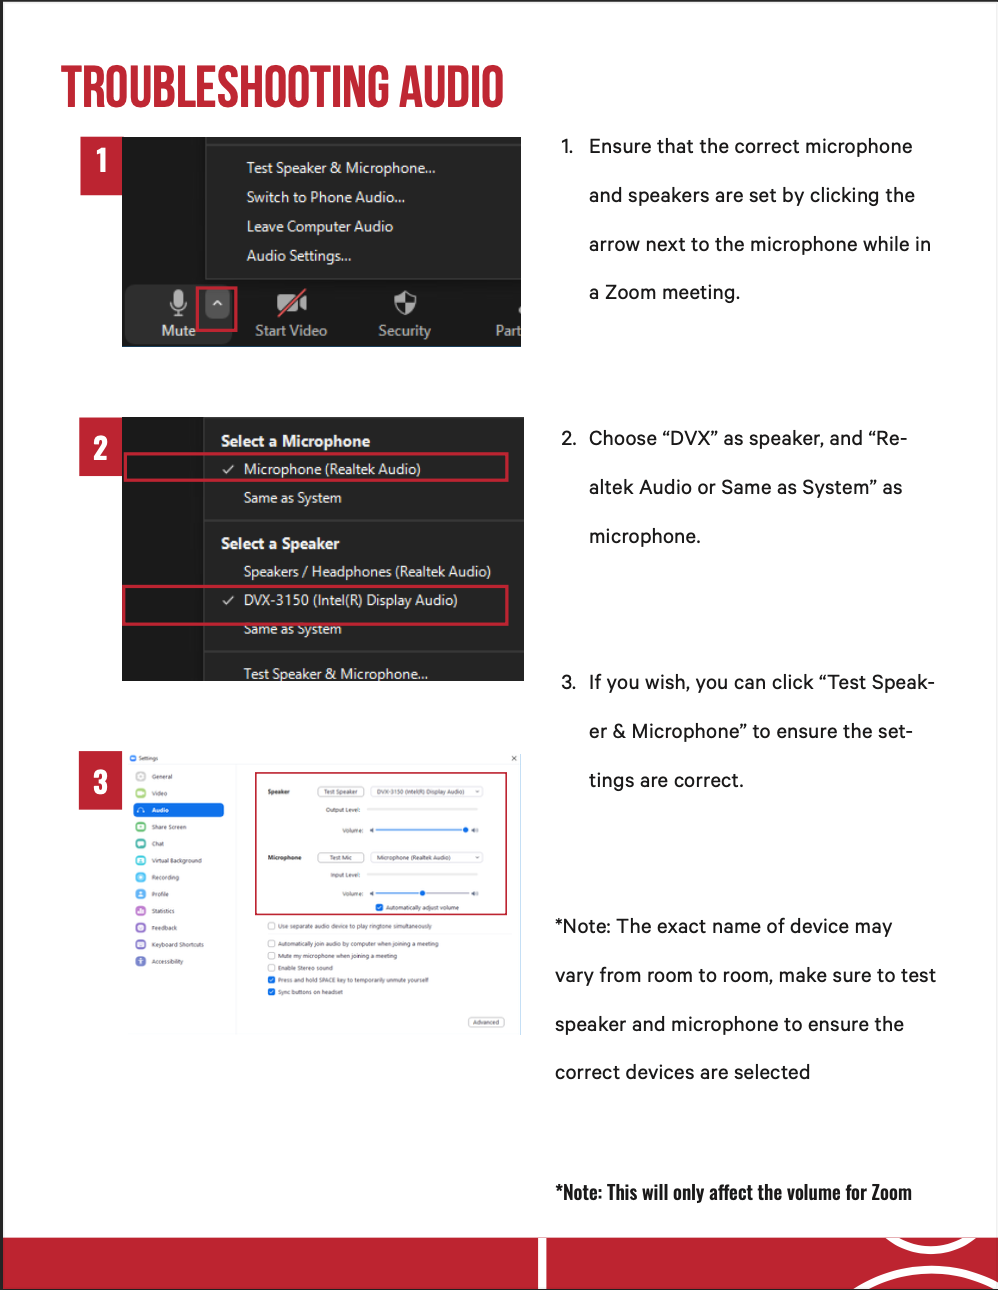
- Ensure that the correct microphone and speakers are set by clicking the arrow next to the microphone while in a Zoom meeting.
- Choose “DVX” as speaker, and “Realtek Audio or Same as System” as microphone.
- If you wish, you can click “Test Speaker & Microphone” to ensure the settings are correct.
*Note: The exact name of device may vary from room to room, make sure to test speaker and microphone to ensure the correct devices are selected.
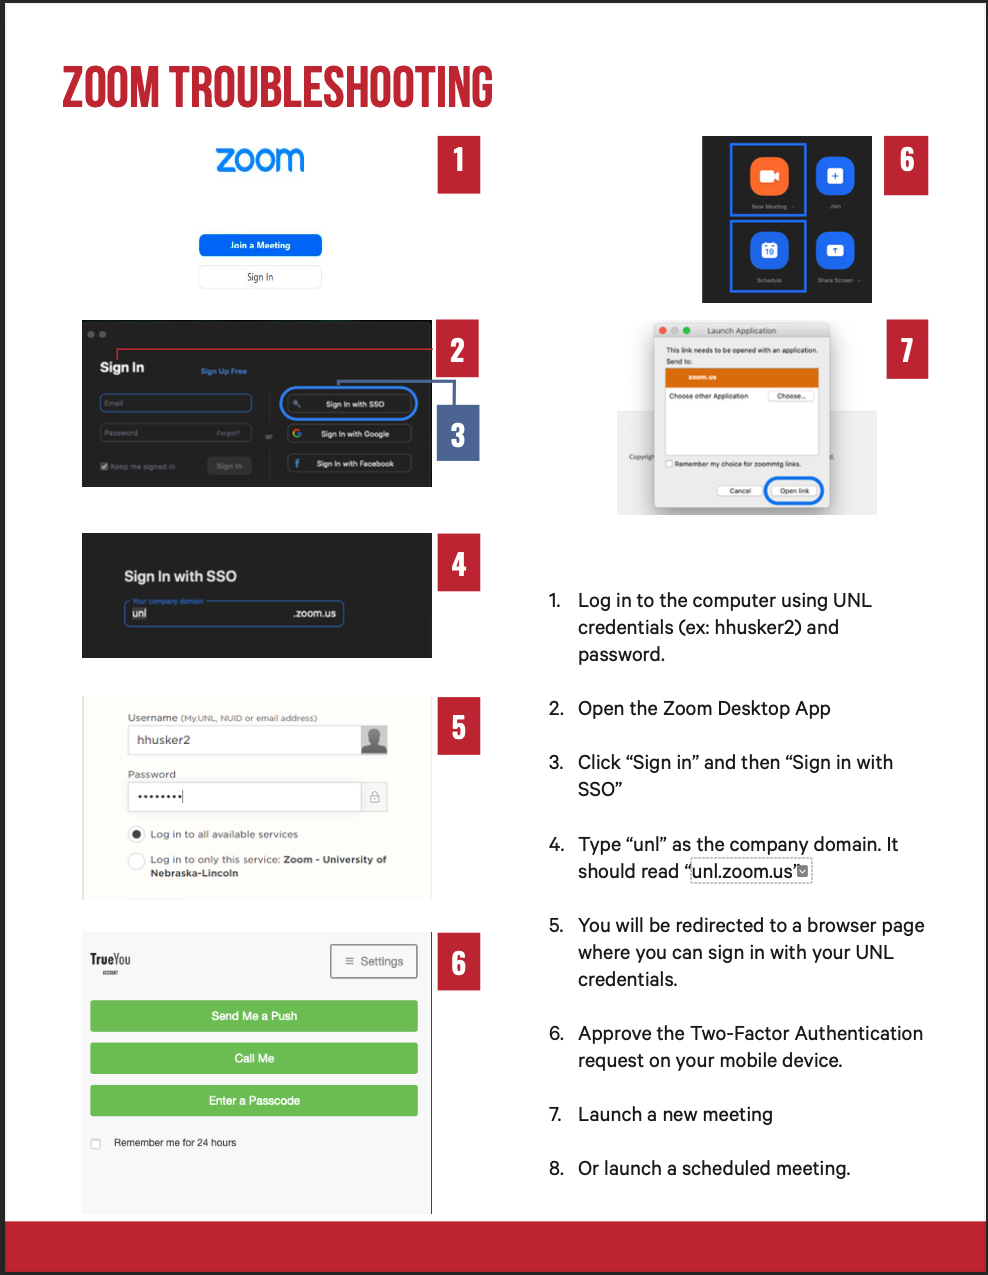
Zoom Troubleshooting
- Log in to the computer using UNL credentials (ex: hhusker2) and password.
- Open the Zoom Desktop App
- Click “Sign in” and then “Sign in with SSO”
- Type “unl” as the company domain. It should read “unl.zoom.us”
- You will be redirected to a browser page where you can sign in with your UNL credentials.
- Approve the Two-Factor Authentication request on your mobile device.
- Launch a new meeting
- Or launch a scheduled meeting.